
Preface
Q: Why does e-waste often get a second life? A: Hackintosh;
My very first computer in my life was a 2015 MacBook Pro. As the last MBP with the “faith light” (the glowing Apple logo), it still has a solid market today—lots of big shots are still using it. macOS’s usability, its support for high-DPI displays, a slightly less “rogue software” ecosystem, and the powerful Apple ecosystem have always had me hooked. I’d been drooling over last year’s 16-inch model for a long time, so I kept feeling my current machine was a bit underpowered. But with that expensive price tag and my shy wallet, I figured I’d wait and see—end-of-year ARM, next year’s Tiger Lake, the whole “wait-for-the-next-one” club. You never lose.
Turns out the one who understands me best is always Zhang Dama. Recently there were a few M73 Hackintosh posts on Zhang Dama that were just insanely good. Lenovo’s old 1L mini PC model M73—200-ish RMB, and people can do so many tricks with it—made me dig the videos back out and study again. After watching, my inner “trash picker” spirit reignited. I decided to build one and try it. I really hadn’t experienced what macOS feels like on a standard-voltage CPU. I’d previously tinkered with Hackintosh on a NUC8i5 and a T470, and the experience was just so-so. I follow Xiaobing’s blog and hang around Yuanjing; I’d actually seen Sibotu’s M73 video before, but didn’t pay much attention at the time.
The reason I didn’t care back then was I used to stick to the “buy new, not old” principle—trying to ride the wave of the times—until I ran into Xianyu and became a “trash picker”… that’s another story… But then I realized my company PC has a 4th-gen i5-4590, and it’s surprisingly good. Not sure if Intel has been coasting this hard, or if my daily compute needs just don’t warrant pulling out the big knife. After doing a ton of homework and comparisons, aside from Intel’s “toothpaste squeezing” over the years, the 4th-gen Haswell architecture’s single-core performance isn’t that far behind today’s Coffee architecture. The gap is more obvious in multi-threading and power consumption.
So I wrote this article as the first post in my tinkering series—just to document it. Since I’ve been playing with Hackintosh for quite a while, this is more unboxing + tutorial style, and I hope it gives some ideas to others who want to tinker too. All the software/tools used are provided at the end of this post (jump via the right-side TOC). The EFI is based on Sibotu’s v3 with my modifications. Honestly, Sibotu’s work is already very complete. I changed three things: 1) Set VRAM to 2048MB to reduce the chance of screen glitches. 2) Added the M73 speaker driver. 3) Disabled verbose boot mode.
M73 Unboxing
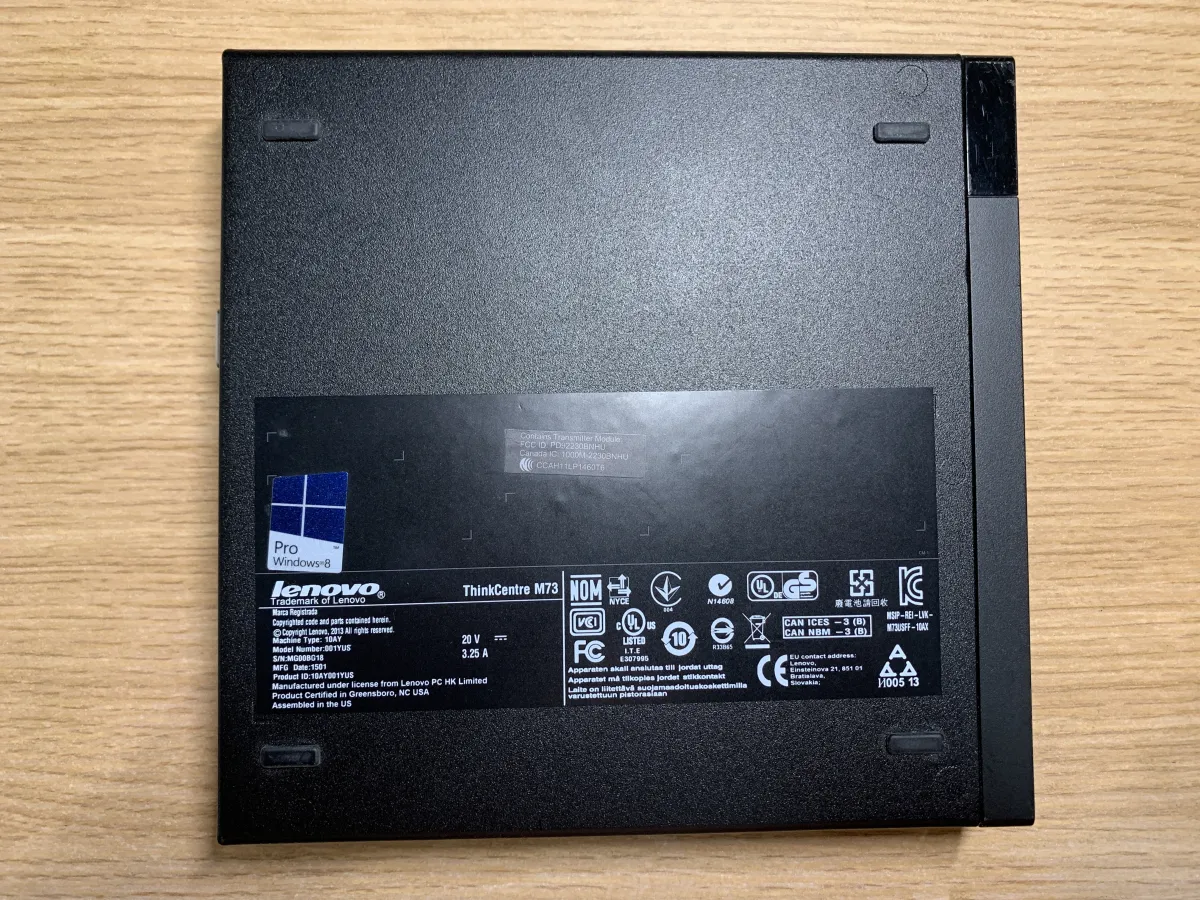
Back in August I was seeing prices around 200. Now it’s 280+ and often without a power adapter. I finally found a store that looked like it had a clean unit, 280 RMB shipped, and it even included a 65W adapter. Since I’m using a 4690T, I feel 65W might be a bit tight, but hey—free power brick, I’ll use it first. When it arrived I was shocked: the host is super new, and the packaging gives you a real sense of security.

But the adapter is smaller than I expected. During the pandemic my computer was left at school, so at home I bought a ThinkPad T490 for studying convenience, and it came with a 65W USB-C adapter that’s huge. I suspect Lenovo intentionally made it big to boost “lipstick power adapter” sales… same wattage, yet it keeps getting bigger. Anyway this one is rated 65W; later I’ll test whether there’s any headroom.


On the front there are separate 3.5mm headphone/mic jacks, two USB 3.1 ports, and the yellow one supports 10W “powered-off charging.” With a 65W adapter, I suggest not charging your phone from it—don’t be the last straw that breaks the host, it can trip power in minutes. The rows of slanted lines are fin-style vents for pressure balancing, not actual cooling vents. There’s also a power button up front with a mysterious feel—kinda loose, but oddly comfortable to press…..

On the back from left to right: Lenovo’s iconic square power port, DP for monitor, two USB 2.0 for peripherals, a prehistoric VGA—but macOS doesn’t support VGA, so it’s useless once you Hackintosh it—one gigabit RJ45, another USB 2.0, and the hole above the rightmost USB is for the Wi-Fi antenna. Even though I’m using Wi-Fi, I plan to use soft antennas stuck under the top cover instead of having two antennas sticking out the back—it looks ugly. The mesh at the top-left is the cooling vent; inside there’s a copper heatpipe and fan for heat transfer.

Officially it’s only 1L. A bottle of Coke is 250ml, so yeah—about that. It’s about half the size of a laptop, and still smaller than Intel NUC… but you’ve gotta talk price. Performance-wise, with a standard-voltage CPU it should be much stronger compute-wise, though the iGPU is a bit weaker.

You can clearly see it’s about half a can. Since it’s a desktop, portability isn’t the point. But honestly, putting it at home does save a lot of space.

The monitor is from “Zhaiwang” during last year’s promotion period: a BOE 300-nit IPS 4K panel. JD often runs promos for under 1000 RMB. Customer service said macOS support isn’t great, but practice is the only truth—this is a Hackintosh weapon. Cheaper than DIY, and I really don’t know how the seller makes money.

Materials
Below is all the hardware I used. I chose relatively “better” parts—CPU and RAM are basically maxed out—so the price is a bit higher. Luckily I could still find some parts in my junk pile. If you’re just getting into it, I suggest an i3 and 8GB is enough; you can finish it for 700–800 RMB.
| Name | Xianyu market price | Actual cost |
|---|---|---|
| Host - M73 | 280 | 280 |
| CPU - 4690T | 400 | 0 (owned) |
| RAM - DDR3L Kingston 8G*2 | 150*2 | 0 (owned) |
| Wi-Fi card - BCM94352HMB | 100 | 100 |
| SSD - Kingston SATA 240G | 150 | 0 (owned) |
| Total | 1,230 | 780 |
Since the seller only provides the host, it’s basically a barebone—just the case and motherboard, and you need to supply everything inside. That’s actually more friendly: you can control what you choose. Here’s the hardware I used this time:
This is the strongest “T” CPU under LGA1150. The iGPU is HD4600 and can drive 4K@60Hz. What I really care about is the iGPU, because I have a 4K display, and without 4K + HiDPI on macOS, what experience are we even talking about? But the cost is obvious: the price is very high. On Xianyu, this CPU’s market price is basically double the host… terrifying. But I met a good seller—kept pestering, acting cute, bargaining—and finally got it for 400. A steal, a steal~. The condition is also excellent. On Xianyu it’s hard to find CPUs like this—most are scratched to hell or covered in layers of labels. This “like-new, one-owner personal use” is truly rare.

With such a good CPU, how can RAM not keep up? These sticks have been sitting idle for a long time—I wanted to sell them but couldn’t bear to. I checked the price for this article and I was stunned: DDR3 8GB second-hand is 150+ RMB now. That’s pure mysticism. I didn’t expect it, since brand-new DDR4 8GB can also be had for 150. Turns out there are so many trash pickers tinkering with old hardware that prices just won’t fall.

This is the Wi-Fi card. 100 RMB is basically free. It’s very new; I suspect it’s also first-hand, unlike the “glamorous” Xianyu cards with labels pasted over and over. There are many “perfect Hackintosh” tutorials online, and their “perfect” largely means AirDrop works—because it represents the Apple ecosystem: file transfer between devices, universal clipboard, iPad Sidecar, and a bunch of super practical features are built on AirDrop. But the requirements are very strict. Typical Wi-Fi cards can’t achieve this because Apple only uses Broadcom cards, and Broadcom only does OEM and doesn’t sell to consumers… So the best approach is to use a pulled card—like when a Mac breaks and someone sells its Wi-Fi card. It’s pricey, but it’s the best way. And as Apple’s hardware control gets stricter (e.g., T2 chip for hardware security), Wi-Fi is now soldered on the motherboard. Pulled cards are disappearing—one less every time you buy one. So what are you waiting for?


The thermal paste is a few years old. Thermal conductivity is 8.5W—one of the strongest consumer pastes, and the price is also “the strongest.” When I bought it, 8g was nearly 100 RMB. I’ve been using it on and off; 8g lasting 4–5 years is totally worth it. I bought this in my freshman year, also for tinkering—got impulsive and wanted to repaste my not-long-ago purchased laptop….. Same logic as buying a pricey case and screen protector for a new phone. I gritted my teeth and bought it. Of course, once the computer gets old, you stop caring about heat and just abuse it…. JD still sells it for 60 RMB per 8g, and the price is still rock solid.

Assembly
After the intro, let’s tear it down and assemble.


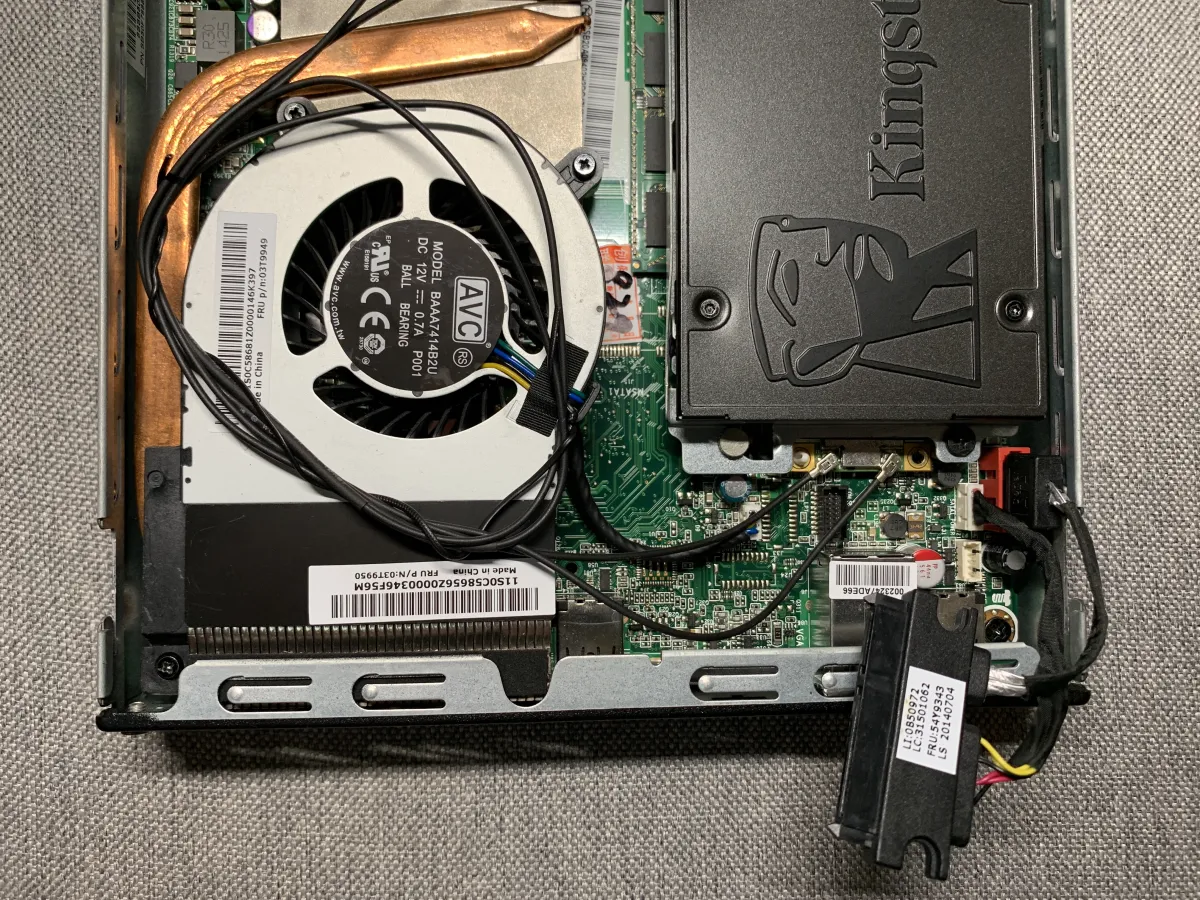
After opening it up, it surprised me: the motherboard is insanely clean—no dust, and the PCB is shiny. Huge win. Next, just install the hardware.

First, install the CPU.

Same old reminder: align the notches. Don’t mess up the pins. If you bend a pin, it’s basically very hard to recover. Make sure it’s correct before pressing the bracket down—don’t “force it and pray.”

Insert RAM starting from the inner slot. Align the notch, insert into the bottom, then press down until you hear a “click.” One stick is done. Then insert the upper slot and press down until you hear another “click.”

This motherboard is interesting—it uses clips. The Wi-Fi card has antenna connectors at the top. Since connecting them now would look messy, I’ll connect them to the top cover at the end.

Now install the heatsink and fan. Before that, apply thermal paste. I’m using the globally best “X method” that needs no explanation and accepts no rebuttal. For standard-voltage CPUs, the application pattern actually matters; for low-voltage it’s more like psychological comfort. The X method is widely considered a good way to avoid uneven spread. I always do it this way.

Dell and HP have similar mini PCs, but they often don’t include a heatpipe and just rely on the fan pressing down. Lenovo adding a copper heatpipe provides better cooling and better performance.


I didn’t plug in this ribbon cable yet, because I need to connect the Wi-Fi antennas below, and plugging it in would block access.


Creating the Boot Image
The core of a Hackintosh is the EFI, not the boot image or the system image. So I didn’t pre-configure a bunch of EFI parameters like most reference posts do. Everyone wants a one-shot success, which makes the barrier too high and scares off beginners. My approach is: use Sibotu’s default EFI first, get into the system, then use the eternal Hackintosh god—Hackintool—to adjust parameters. Follow the principle that important things should be tuned carefully at the end. So I simplified installation into two steps.
-
For the boot image, I use an already offline-downloaded one, write it to my USB drive with “imageUSB”, and boot into the installer via USB.
- Download and open the resource pack, open the first folder - Create Boot USB. There are two files inside: imageUSB.exe is the tool to write to the USB drive, and bootloader.img is the bootloader image modified for M73 based on Apple offline download.

The resource pack will be provided at the end of the article—this is the first folder - Open imageUSB.exe, then in the big box of step 1 select your USB drive, and in step 3 specify the bootloader.img mentioned above. Leave everything else unchanged and click Write.

Click Write to start flashing the image - After the progress bar finishes, check the USB drive you selected. You’ll see its volume name has been changed to BOOT. Open it and there’s only an EFI folder (there’s also a hidden folder). At this point, the USB drive can already boot our EFI. But as mentioned above, the core is EFI, and future upgrades are mainly replacing EFI files. So to ensure the EFI is up to date, we replace it: use the resource pack’s second folder - 2.EFI (copy the EFI folder inside). As the folder name suggests, copy the EFI folder and replace the one under the BOOT volume.

Replace EFI
At this point, the boot USB is ready. Next we’ll boot the M73 to install macOS. Some of you might be thinking: that’s it? That’s it? That’s it? Other posts have a long list of operations. In reality, I didn’t skip a single step—I just used a simpler way to achieve the same result. Of course, there are trade-offs. For example, in Sibotu’s tutorial, you need to install Python and run his script. The script downloads the macOS recovery image from Apple, and you still need to go through complex steps to choose the version, then use the script to write the image to USB, and after writing, use the script to adjust EFI. That whole process is really discouraging. Downloading offline and writing with a tool is simpler, but you can’t dynamically fetch different recovery image versions. It’s up to your preference. I recommend achieving the goal the simple way first, then spending time studying the principles later.
- The system image is downloaded and installed online from Apple’s official recovery program in the installer UI.
Insert the USB drive we just made, press that mysteriously satisfying power button, and start the installation. On the POST screen, press F12 to enter the boot device menu, and select our boot USB. After entering, you’ll see the first screen of the boot USB. Here you choose the function to boot into. We choose the third one—Apple’s official recovery mode. Through this recovery mode, we’ll install macOS 10.15.6 online onto our computer. Use the keyboard up/down and Enter to navigate and confirm. If you don’t do anything for 3 seconds, it defaults to the first option automatically. Since we need the third, you must act quickly. If you want to study it carefully, press any key to interrupt the auto-boot. After selection, it will run some code; you may see lots of logs you don’t understand—ignore them and just wait.


At this point we’re already halfway there. Next, format the system disk to prepare for installation, then let Apple automatically install the system—totally foolproof.


Then you can install—just keep clicking Next and wait for the system to install automatically. It may reboot multiple times. Don’t remove the boot USB, because during reboot the bootloader needs to bring the system back into the installer. After each reboot, just select the first option “macOS installer.” Otherwise it will say it can’t find an OS and keep trying to reboot. After installation, we’ll copy the boot EFI to the hard drive, so future reboots will be like a normal computer.


At this point, the system is installed on the hard drive, but we’re still booting via USB. We still need to enter the system and write the USB boot files onto the hard drive.


Now macOS is installed on the M73. The steps are probably the simplest among public posts. After generations of continuous effort by the community, installing a Hackintosh is actually even easier than installing Windows: make a boot USB, and the rest is handled by Apple’s installer. But the key is compatibility—after the system is installed, how do you minimize hardware “rejection” against macOS? Besides choosing hardware close to real Macs, the rest is endless adaptation, spoofing, and trial-and-error. Not every machine is as lucky as the NUC8. So next, we’ll get rid of USB booting under macOS, spoof a few incompatible parts, and generate SMBIOS values so we can sign in to Apple ID.
Post-Boot Tweaks
From here on are macOS screenshots—hard to deny macOS really looks good
-
Check completeness

Latest system version 
Spoofing a 2015 iMac 
Bluetooth 4.1 works 
HiDPI looks great 
AirDrop is very fast -
Get rid of USB booting, put EFI onto the system disk
We’re only 80% done. The computer works, but if you reboot it, it’s dead. Now we need to put the USB bootloader onto the hard drive. We’ll use a tool to mount the system’s EFI partition, delete the existing EFI folder, and replace it with our EFI. Steps:

Extract Hackintool from folder 3 in the resource pack and copy it into Applications 
After opening, click Disks, then click the red-circled button and enter your password 
Now the red-circled button is clickable—click it to open the EFI disk Open the EFI disk. Inside there’s a system EFI folder. Delete it and replace it with the EFI from resource pack folder 2, or the EFI from your boot USB (they’re the same—use whichever is convenient).

Open the EFI disk, delete the EFI folder inside, and replace it with the M73-specific EFI 
Directory structure after replacement At this point, EFI replacement is complete. The host can boot independently and work normally, and you can remove the boot USB.
-
Generate SMBIOS values so you can sign in to Apple ID
Apple is famously strict about product control. Globally unique serial numbers make counterfeiting harder. Now we need to generate a serial number for our computer so we can sign in to Apple ID. Although the resource pack includes a set of SMBIOS values, everyone can use the same ones. Once too many people use them, Apple IDs get banned. So we’ll use Hackintool to generate our own:


Summary
After countless forced shutdowns, countless image flashes, and endless EFI edits and replacements, I finally got Hackintosh running on the M73. I have to say: a standard-voltage CPU is insanely satisfying. I originally thought the fan wouldn’t be able to handle the heat, but in reality the fan is very quiet—you can only hear it when you get close—yet it can sustain 40W output, which really surprised me.
Overall it’s pretty perfect. I didn’t run into software issues, and the experience is very similar to my real Mac. The only thing is wake sometimes fails, but after enabling TRIM on the SSD it’s much better—just a slight delay. There are actually many more software and BIOS tuning steps I didn’t detail due to length. If I run into another “too good to be true” machine in the future, I’ll share it again.
In the end, even though Hackintosh has this and that little issue, it doesn’t stop me from loving it. It’s a lot of tinkering, but when you fully commit to something, slowly moving forward through mistake after mistake, the sense of achievement when you finally succeed is enough to keep me happily addicted.


Resources
-
The resource pack is shared via Tianyi Cloud Drive. Login required, no client required, tested with no speed limit

https://cloud.189.cn/t/BRvAZjBJ73e2 - VS Code that you might use, download from the official site (you can actually just edit with Notepad)
-
https://go.microsoft.com/fwlink/?LinkID=620882center>
All articles in this blog, unless otherwise stated, are licensed under @Oreoft . Please indicate the source when reprinting!